If you are moving an aquarium. Please print out these step by step instructions. I can be a difficult choice to my your fish tank. Some aquarists sell their aquarium and start with a new tank and their new location. That way they can plan and do things a little differently. If you want to keep your exist saltwater aquarium setup, moving a large reef aquarium will be a full day’s work. You might also need a helping hand from a friend during the move. In the perfect world, you would have a new aquarium up and running at the new location and the fish and coral could simply be transfered over. But this isn’t practical for most people.
Moving An Aquarium Instructions
1. Start moving an aquarium early in the day. This will give you plenty of time to visit the fish and hardware store in case of any emergencies.
2. You will need plenty of containers, buckets, bags and towels.
3. Begin by turning off the power to the fish aquarium, with exception to the lights.
4. If you have a sump, drain the sump and remove all the equipment as quickly as possible. Don’t worry about cleaning the equipment at this time. You may clean the equipment prior to or after the move.
5. Remove all the corals from the aquarium and place them into bags with a bit of pre-washed activated carbon to prevent toxic build up from their slime. You may place the corals in a styrofoam container or cooler with heat or cold packs to maintain temperature.
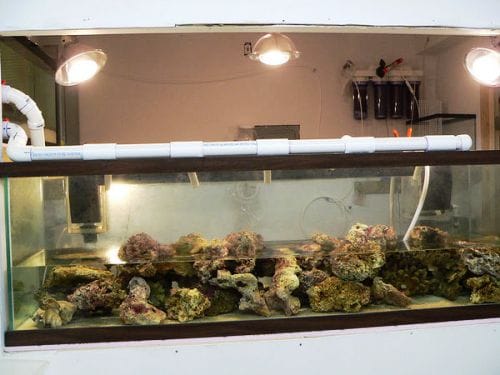
6. Next remove as much live rock as possible. Be careful not to trap any fish or invertebrates inside of the caves. You may wrap the live rock with newspaper to keep it moist and then place it into a container. It won’t need to be submerged in water. Live rock is shipped dry to most saltwater fish stores, so a few hours out of the water won’t hurt it.
7. Remove all pumps, heaters and other equipment from inside the saltwater aquarium.
8. Start siphoning water out of the aquarium into containers and buckets. Stop siphoning when you run out of containers or the water becomes cloudy with debris.
9. As the water level drops begin catching fish and placing them into a bucket with an airstone and heater. To reduce stress, place a cover on the bucket to make it dark. If you happen to have an oxygen tank, you may choose to bag your fish instead.
10. By now, you should have an almost empty saltwater aquarium and sump. In a small aquarium you may choose to keep your substrate, but with a large aquarium you should discard the sand and start with new substrate. Once the sand is disturbed, it will release nitrate and debris which can harm fish in a new reef aquarium. The substrate should be removed in large aquariums as the added weight will put pressure on the seams and make it more difficult to move. Use a wet/dry vacuum to quickly remove the substrate.
11. Disconnect any plumbing from the aquarium to the sump. You may have to re-plumb the aquarium at its new location. If you need to cut any plumbing this is a great time to add in a union valve.
12. Remove the aquarium, stand, light, sump and any remaining equipment and load it into the vehicle with all the livestock. Use blankets, tie downs and foam board to prevent the aquarium from sliding and scratching.
Moving An Aquarium Guide
13. At the new location, place the stand, aquarium and sump in your desired location. Remember to level the stand.
14. Install and turn on the light fixture.
15. Place the new pre-washed Substrate in the aquarium.
16. Aquascape your live rock.
17. Refill the aquarium as much as possible.
18. Connect heaters and circulation pumps in the main aquarium.
19. Turn off the aquarium lights.
20. Float the fish, corals and invertebrates. When the proper temperature is reached, release them into the aquarium. Keep the lights off to reduce stress.
21. You should have a semi-operational display aquarium. This is a good time to take a break.
22. Now it is time to reconnect the sump. You may need to re-plumb the return and drain line, but take your time.
23. Once the sump is re-plumbed, connect your return pump, Filtration and other equipment.
24. Add water to the return pump chamber and test for leaks by starting the return pump.
25. Add water into the overflow and test for leaks in the drain line.
26. Mix fresh saltwater and add it to the sump and aquarium until it is at a normal operating level.
27. Turn on the return pump and move the heater and other equipment from the display tank back into the sump.
28. Set up any other equipment.
29. Continue to Test the aquarium’s water parameters. With the new substrate, your saltwater aquarium may have a small cycle. Perform water changes if necessary.